Painted Flower Pots


We used both recycled and store-bought terracotta pots for these eye-catching flowerpots. Scrub off any dirt or mold if you are using old pots. The pots are sealed with an outdoor gloss varnish so that they can be used for planted flowers.
What you will need :
New or well-cleaned clay pots and clay saucers
Acrylic based clear outdoor varnish (we used Ceramcoat brand) or exterior white primer (we used Kilz brand)
Acrylic outdoor craft paint (we used "Patio Paint")
Foam brushes, if desired
Brushes of different sizes, including a small brush for details
Painters tape, if desired
Marker to trace patterns
Lace tights for the lace flowerpots
Acrylic spray paint for lace flowerpots
New sponge for sponge texture flowerpots
Newspaper to protect your work area


Before you begin painting, seal your pot both inside and out. Sealing the pot prevents water from getting into the clay, which might make the paint flake off. If you want the terracotta color to be part of your design, seal your cleaned pot with a clear outdoor varnish such as Ceramcoat gloss. If you want a white background to make the colors pop out more, use a white primer or sealer such as Kilz. White primers can be difficult to clean out of brushes, so we used a disposable foam brush.
Popsicle Color Flower Pots


Begin by painting the bottom of the pots. It may take a few coats of the acrylic craft paint to cover the pots evenly.


Put painters tape around the bottom edge of the pot's rim and paint the top and inside with a lighter color.


Draw out a shape of your own design or use one of ours as a template (click here for our sun, flamingo, and dancing frog designs). With a marker, trace the shape a few times around the circumference of a pot. Fill in the outlines with another paint color.


Paint a repeating border around the top of the pot. Use the same color for all of the border designs if you want the pots to look as if they are part of the same group. After the paint dries, seal the pot with clear outdoor varnish.
Crazy Quilt Flower Pot


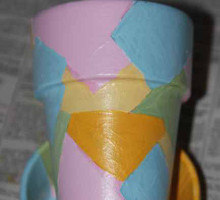
Crazy quilts are pieced together with bits of left over fabric. Start your crazy quilt pot by painting random patches with four or five colors of paint.


After the patches dry, draw in flowers, leaves, stripes and dots with a small brush. Space the designs evenly to make the patches look like a repeating fabric pattern. After the paint dries, seal the pot with outdoor varnish


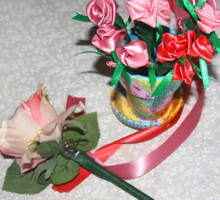
Instead of holding a living plant, this crazy quilt pot holds a bouquet of ribbon flower pens. You can click here for directions for easy flower pens and for ribbon flower pens.
Lacey Flower Pot
We wanted to see if we could transfer the lacey floral designs of an old pair of tights onto a terracotta pot.


We cut off a leg of an old pair of tights and pull it up over a sealed terracotta pot.


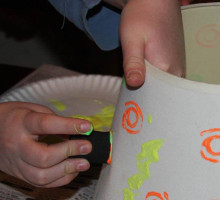
After taping the tights into position, we lightly sponged cream colored paint over the tights.
Our plan did not work!


The paint was too heavy and smudged the lace design. Our second attempt with a lighter touch and a drier sponge came out no better. We put our two smudged paint pots aside, and tried a different method.


We pulled a new section of tights over another pot and taped it into position. We made sure the tights fit relatively tightly around the pot, so that the paint wouldn't creep under the lace. Going outside, we sprayed the pot following the directions on the spray can.
Children should be supervised while spray painting. Do not point the nozzle towards anyone's face or eyes!


After the pot dried outside for a while (spray paint smells stronger than craft acrylic paint!), we pulled the lace from the pot.


The orange of the terracotta pot glows beneath the blue of the spray paint. We gave the pot several coats of clear acrylic outdoor gloss.


Sponge Texture Flower Pot


Our first experiment with the lace tights left two pots with textured paint on their surface. We sponged dark blue and then light blue onto the first pot. After the sponging dried, we painted the bottom of the rim with dark blue.


The tip of a flat brush is a good way for drawing thin lines.
The blue color and sponge texture resembles denim cloth. We painted a cream colored heart onto the front and added dashes of blue to represent thread. After painting "Mom" onto the heart patch, we sealed the pot with outdoor varnish."


For the other smudged pot, we sponged green and then yellow over the surface. We decided to have a repeating heart pattern around the pot. We wrapped a piece of paper around the middle of the pot.


We folded the paper to make a heart paper chain, then traced the hearts around the center of the pot. After we filled in the outlines with blue, we sealed the pot with outdoor acrylic varnish.


