Watercolor Leaves Lesson

Many art teachers use this lesson as an introduction to watercolor. In case you don't have a pile of autumn leaves handy, we have included tree leaf patterns that you can print out. We've also added a variation to this lesson, so that you can make a colorful background for your favorite leaf.
What you will need:
- Watercolor paper (see our recommended supplies page)
- Watercolor such as Crayola or more condensed watercolor in tubes
- Brushes: one that is approximately 1" and another smaller brush
- 2 water cups: one for rinsing brushes and another for adding to paint
- Pencil
- Scissors
- Glue
- Paper towels
Watercolor Leaves


No matter what season it is, you can bring a leaf in from outside to do this project, or you can print out the tree leaf patterns by clicking here. Trace around the leaf shape onto a piece of watercolor paper. If you can't find inexpensive paper at a dollar store, you may find that it is affordable to buy a large sheet from an art store and cut it into smaller pieces.
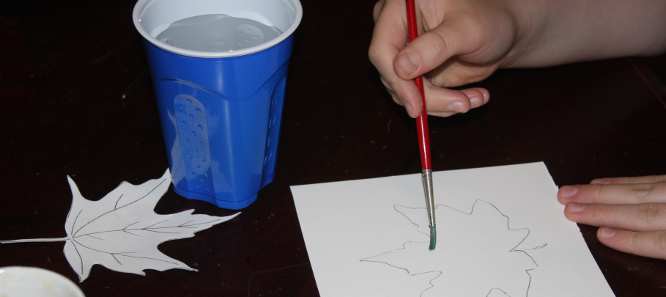

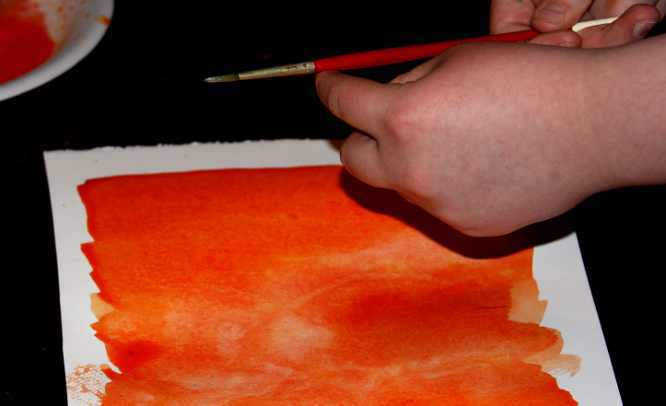
The technique you'll be using for your leaf is called "wet into wet" in which wet paint is brushed onto wet paper. To begin, paint clean water inside the traced leaf.
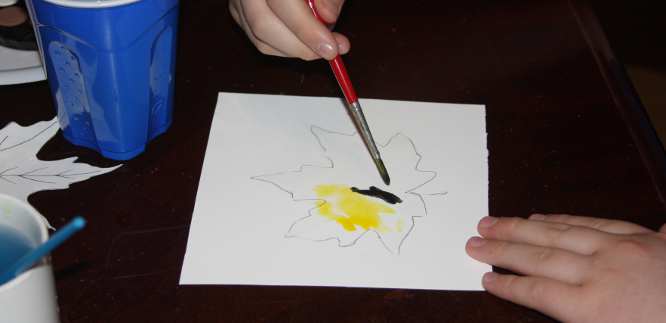

Many times, people mix a lot of water into their watercolor paint so that the color comes out as a light wash. For this project, you want the paint to be thicker, closer to the consistency of cream instead of water. When you touch your brush to the moistened leaf, the paint with bloom.
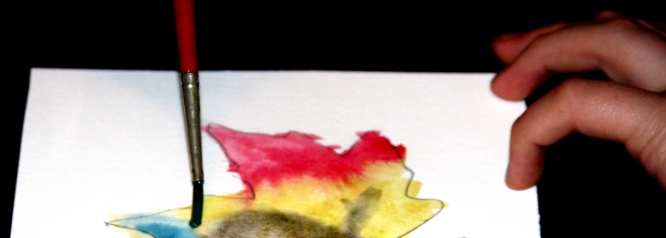

Rinse your brush whenever you change colors. In the above picture, you can see how the red and yellow paint mixed together on the moistened paper. Let children choose whatever colors they want to mix on their leaves. And don't let them worry about staying within the lines!
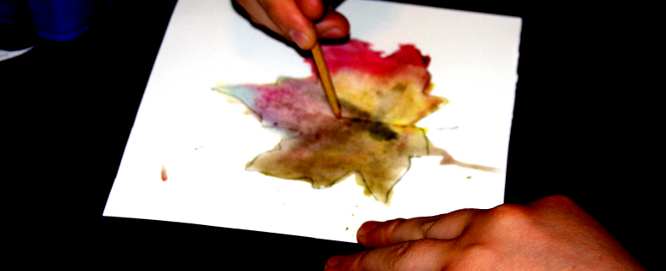

While the paint is still wet, draw the veins onto the leaf with the point of the brush's handle. As you draw, the pressure you put on the point will flatten the paper and leave the veins a darker color.


Let the leaf dry completely before cutting it out.
Watercolor Background
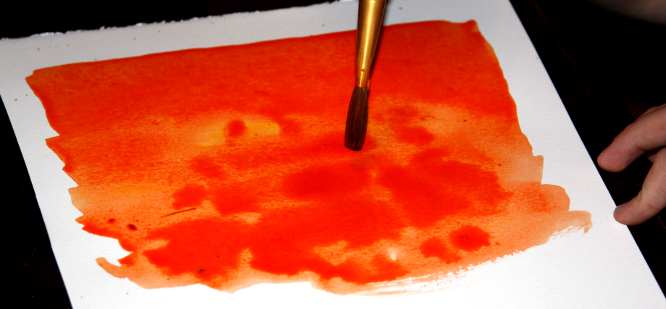

Mix up enough watercolor paint (5 or 6 tablespoons) to cover an area at least 10 inches by 10 inches. Again, you want the paint to be the consistency of cream, not water. Use a larger brush to cover the watercolor sheet.
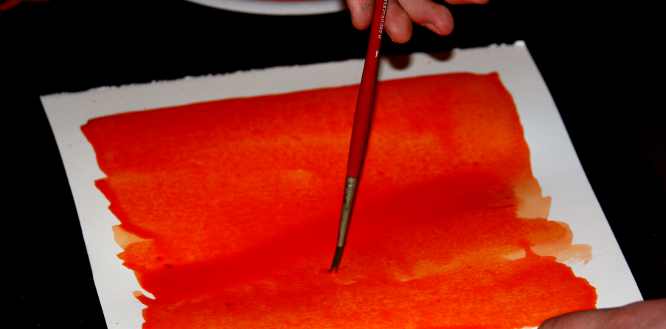

Fill the smaller brush with clean water. Lightly draw lines over the watercolor background while it is still wet. The clean water will push back the watercolor pigment like a river and will leave interesting marks in the paint background.
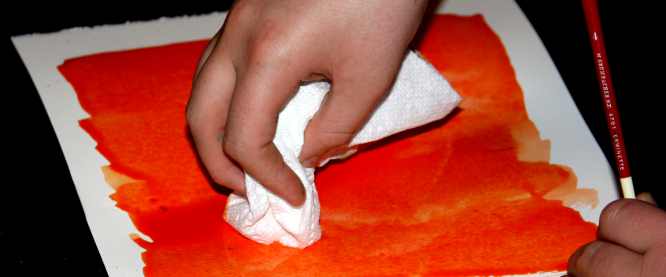

Carefully dab a scrunched paper towel just over the lines you painted with clean water. Some of the color should lift off. Paint over the line again with clean water. Repeat until you like the way the "rivulet" markings look against the paint.

Another way to make interesting marks in the paint is to splatter clean water drops into the still wet background paint. To do this, load your brush with clean water and tap the brush against your finger to sprinkle drops over the paint. You can control into which areas you want the drops to land.


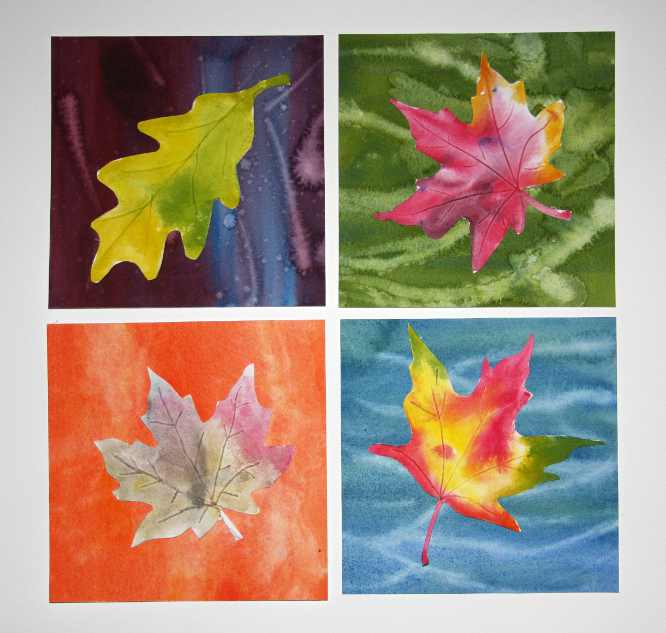
For this background, we painted streaks of red, purple, and blue together. Then we drew in short lines with clean water and added splatters.
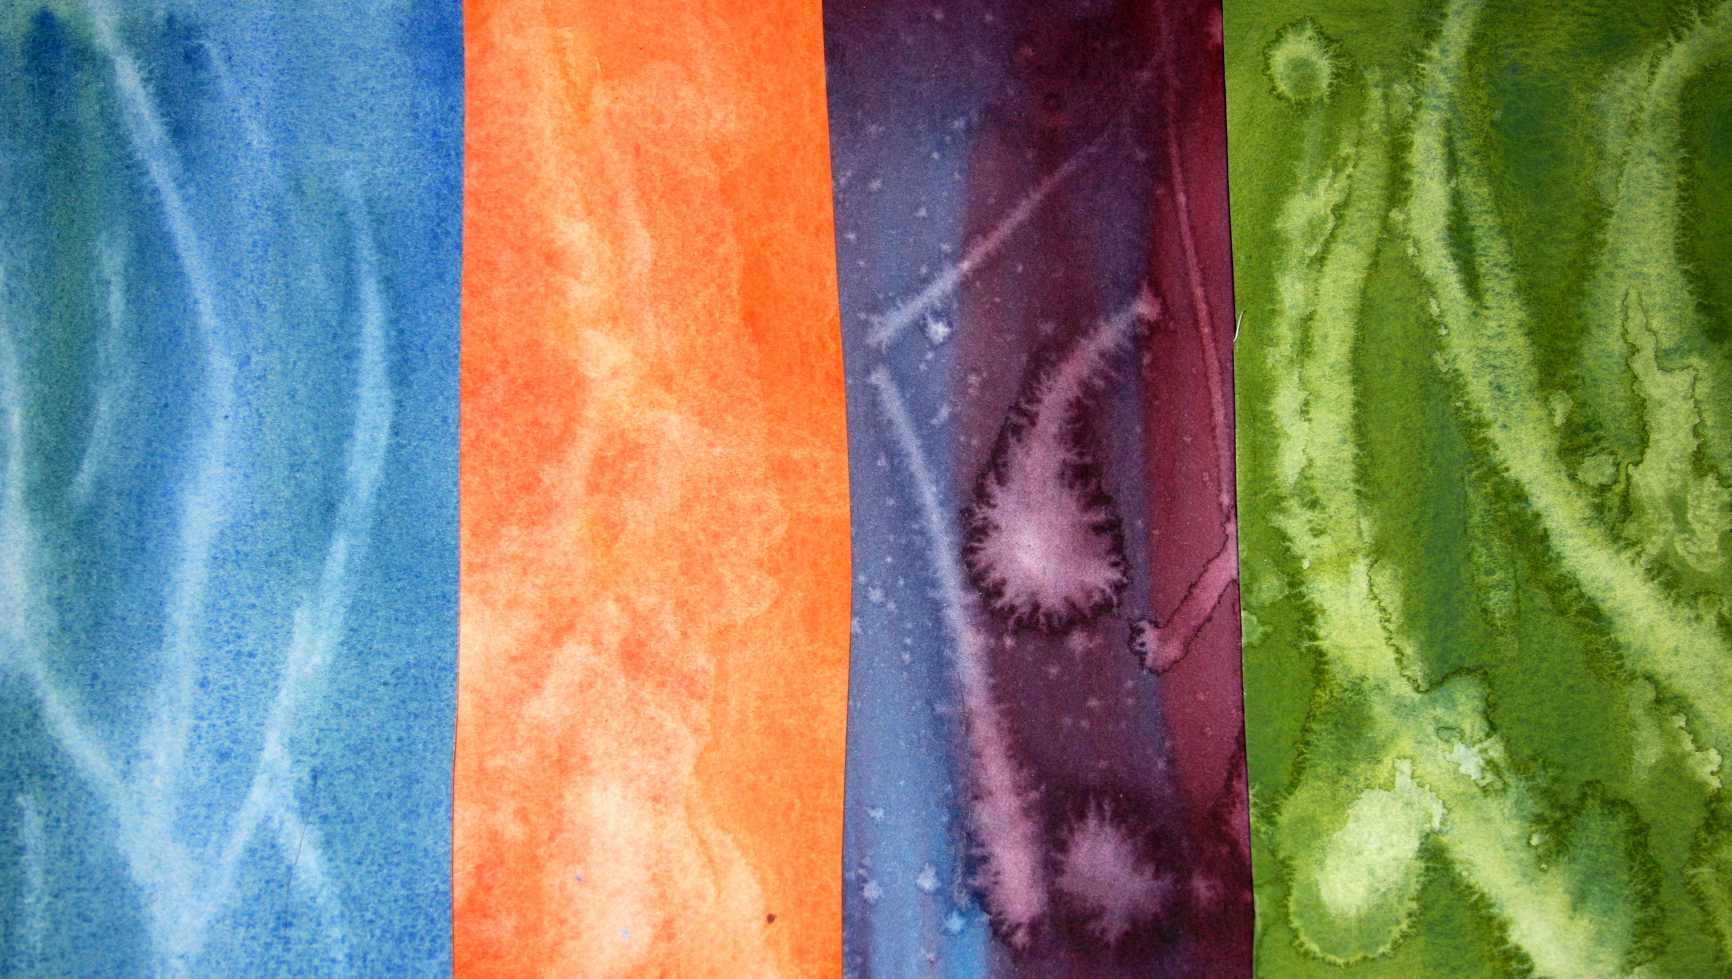

Here are examples of the different effects you can get painting clean water into a watercolor background. When the background sheets are dry, cut them into squares larger than the leaves you've painted. Glue the leaves into position and let them dry.